Backyard Dome Observatory
Two years ago — with some long stretches of downtime in the middle — I started building a permanent observatory in my backyard. It went functional in April 2026: a 10-foot-square building topped with a used 8’ Exploradome, sitting on a pier with a bit of a story behind it. This is a walkthrough of how it came together, what I’d change, and a few of the details that don’t show up until you’re the one bending over to walk through the door.
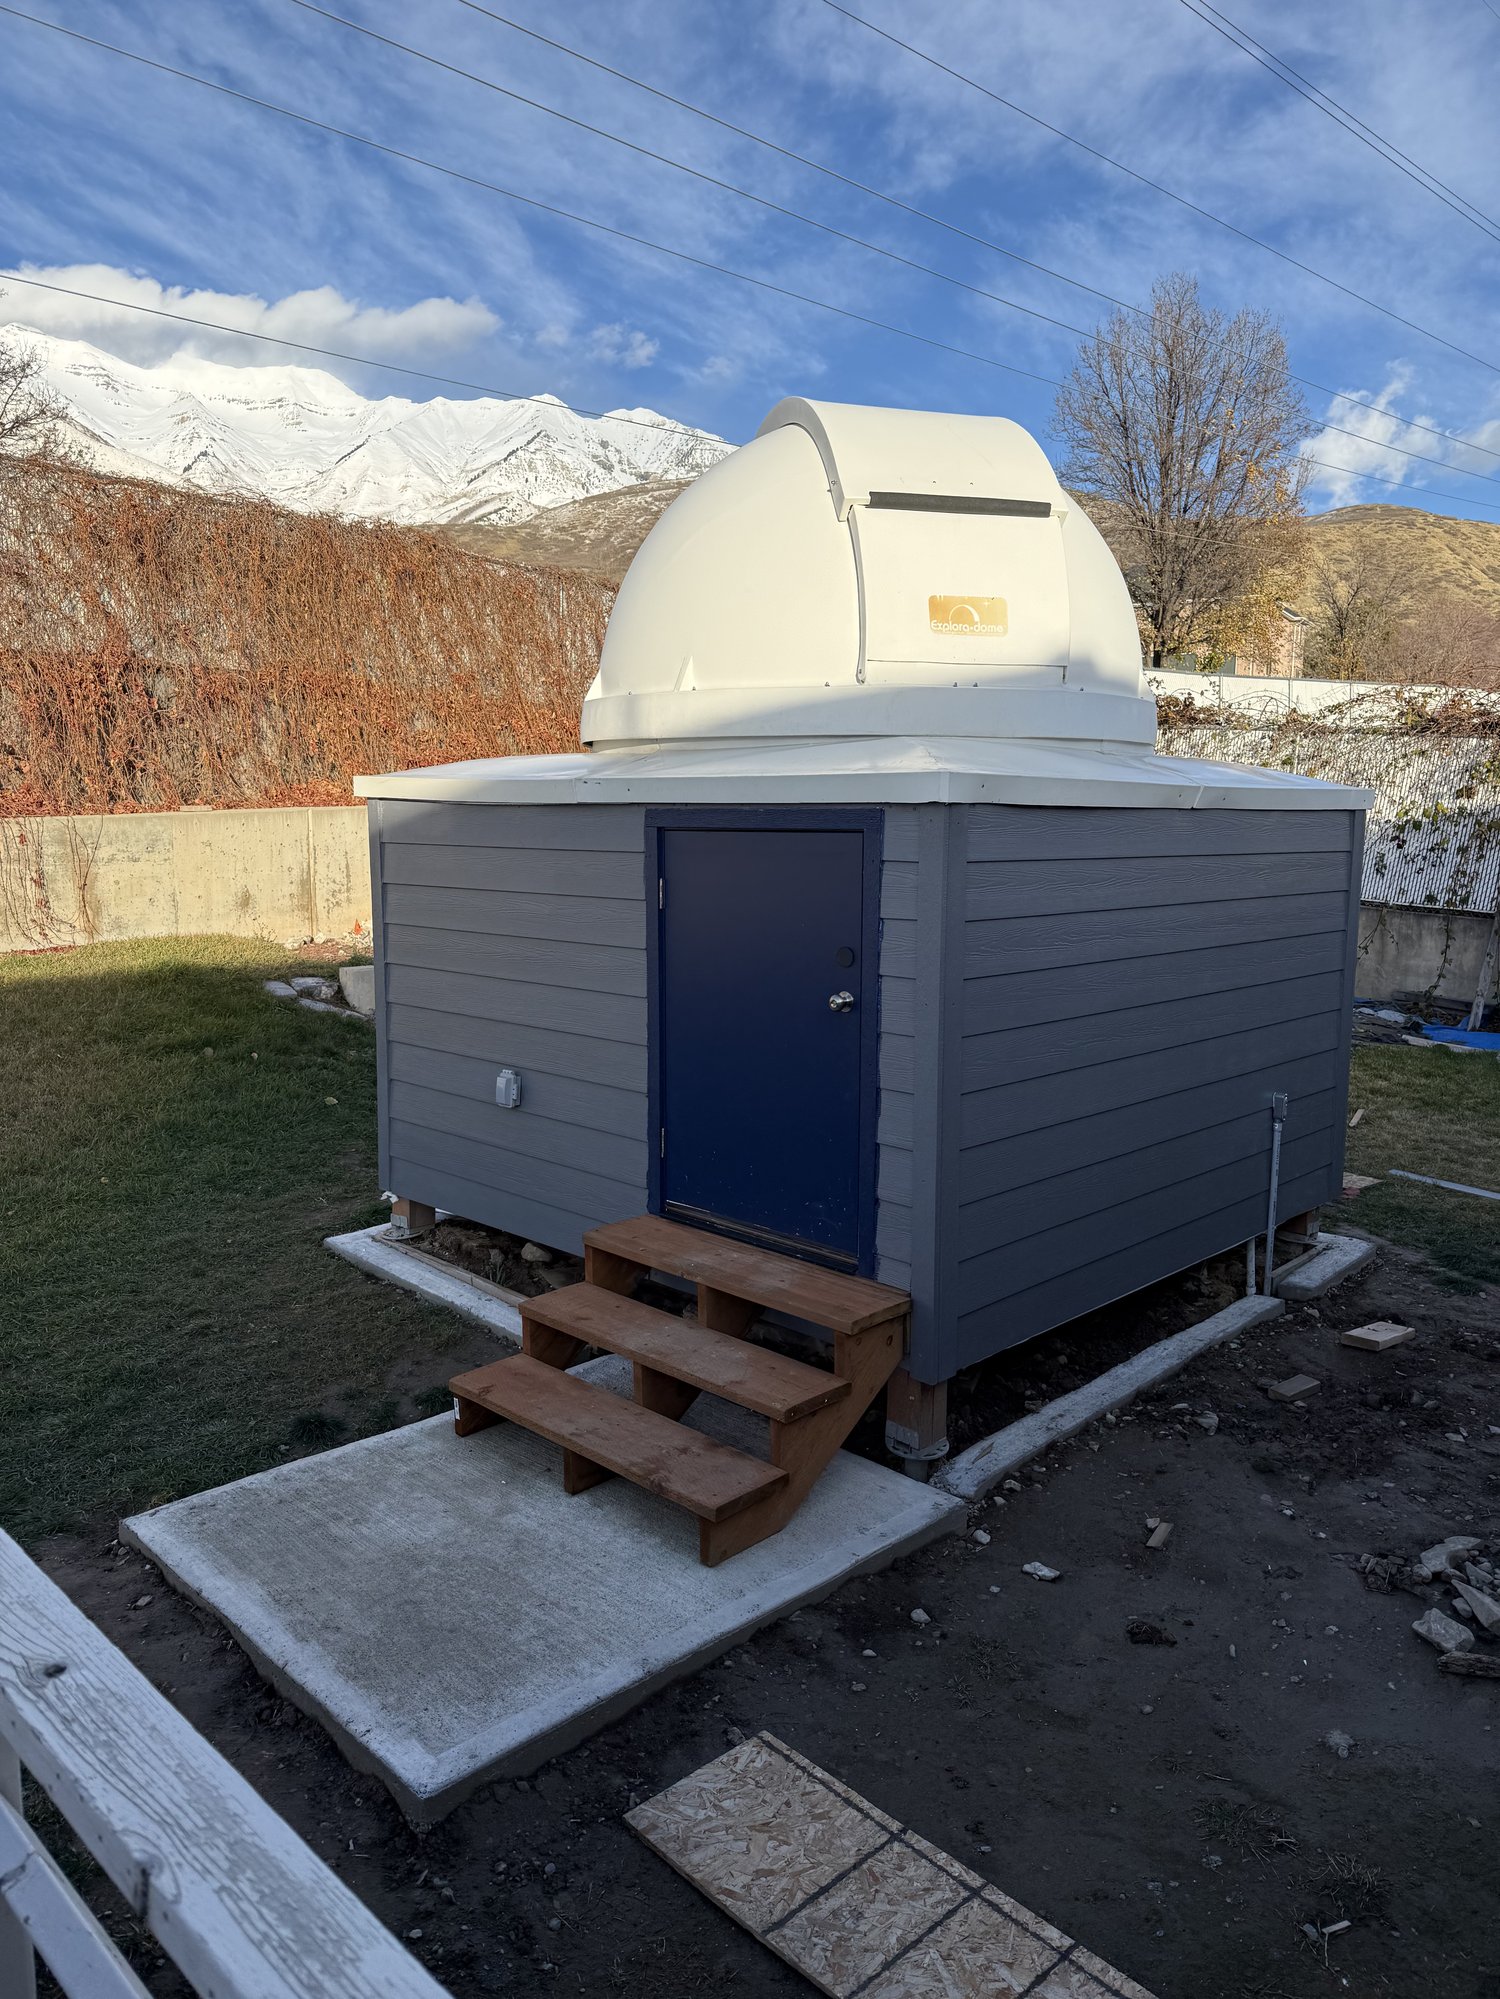 The finished observatory — 10’ square, topped with the 8’ Exploradome, with the Wasatch Range behind it.
Why a dome, and not a roll-off roof
Roll-off roof observatories are simpler to build and usually cheaper, and I considered one. The deciding factor was light pollution of a very local kind: intrusive lights nearby that a roll-off design would have exposed me to all night. A dome, with just a shutter opening pointed at the target, blocks that stray light in a way an open roof can’t. That single constraint drove most of the design from there.
Foundation and pier
The pier needed to be mechanically isolated from the rest of the building — any vibration transmitted from the walls or floor through the mount would show up as trailing in every sub-frame. So the steel center pier sits on its own concrete pier, sunk about 35 inches into the ground, with no shared structure connecting it to the building around it. The building itself floats independently on four helical screw piers, one at each corner.
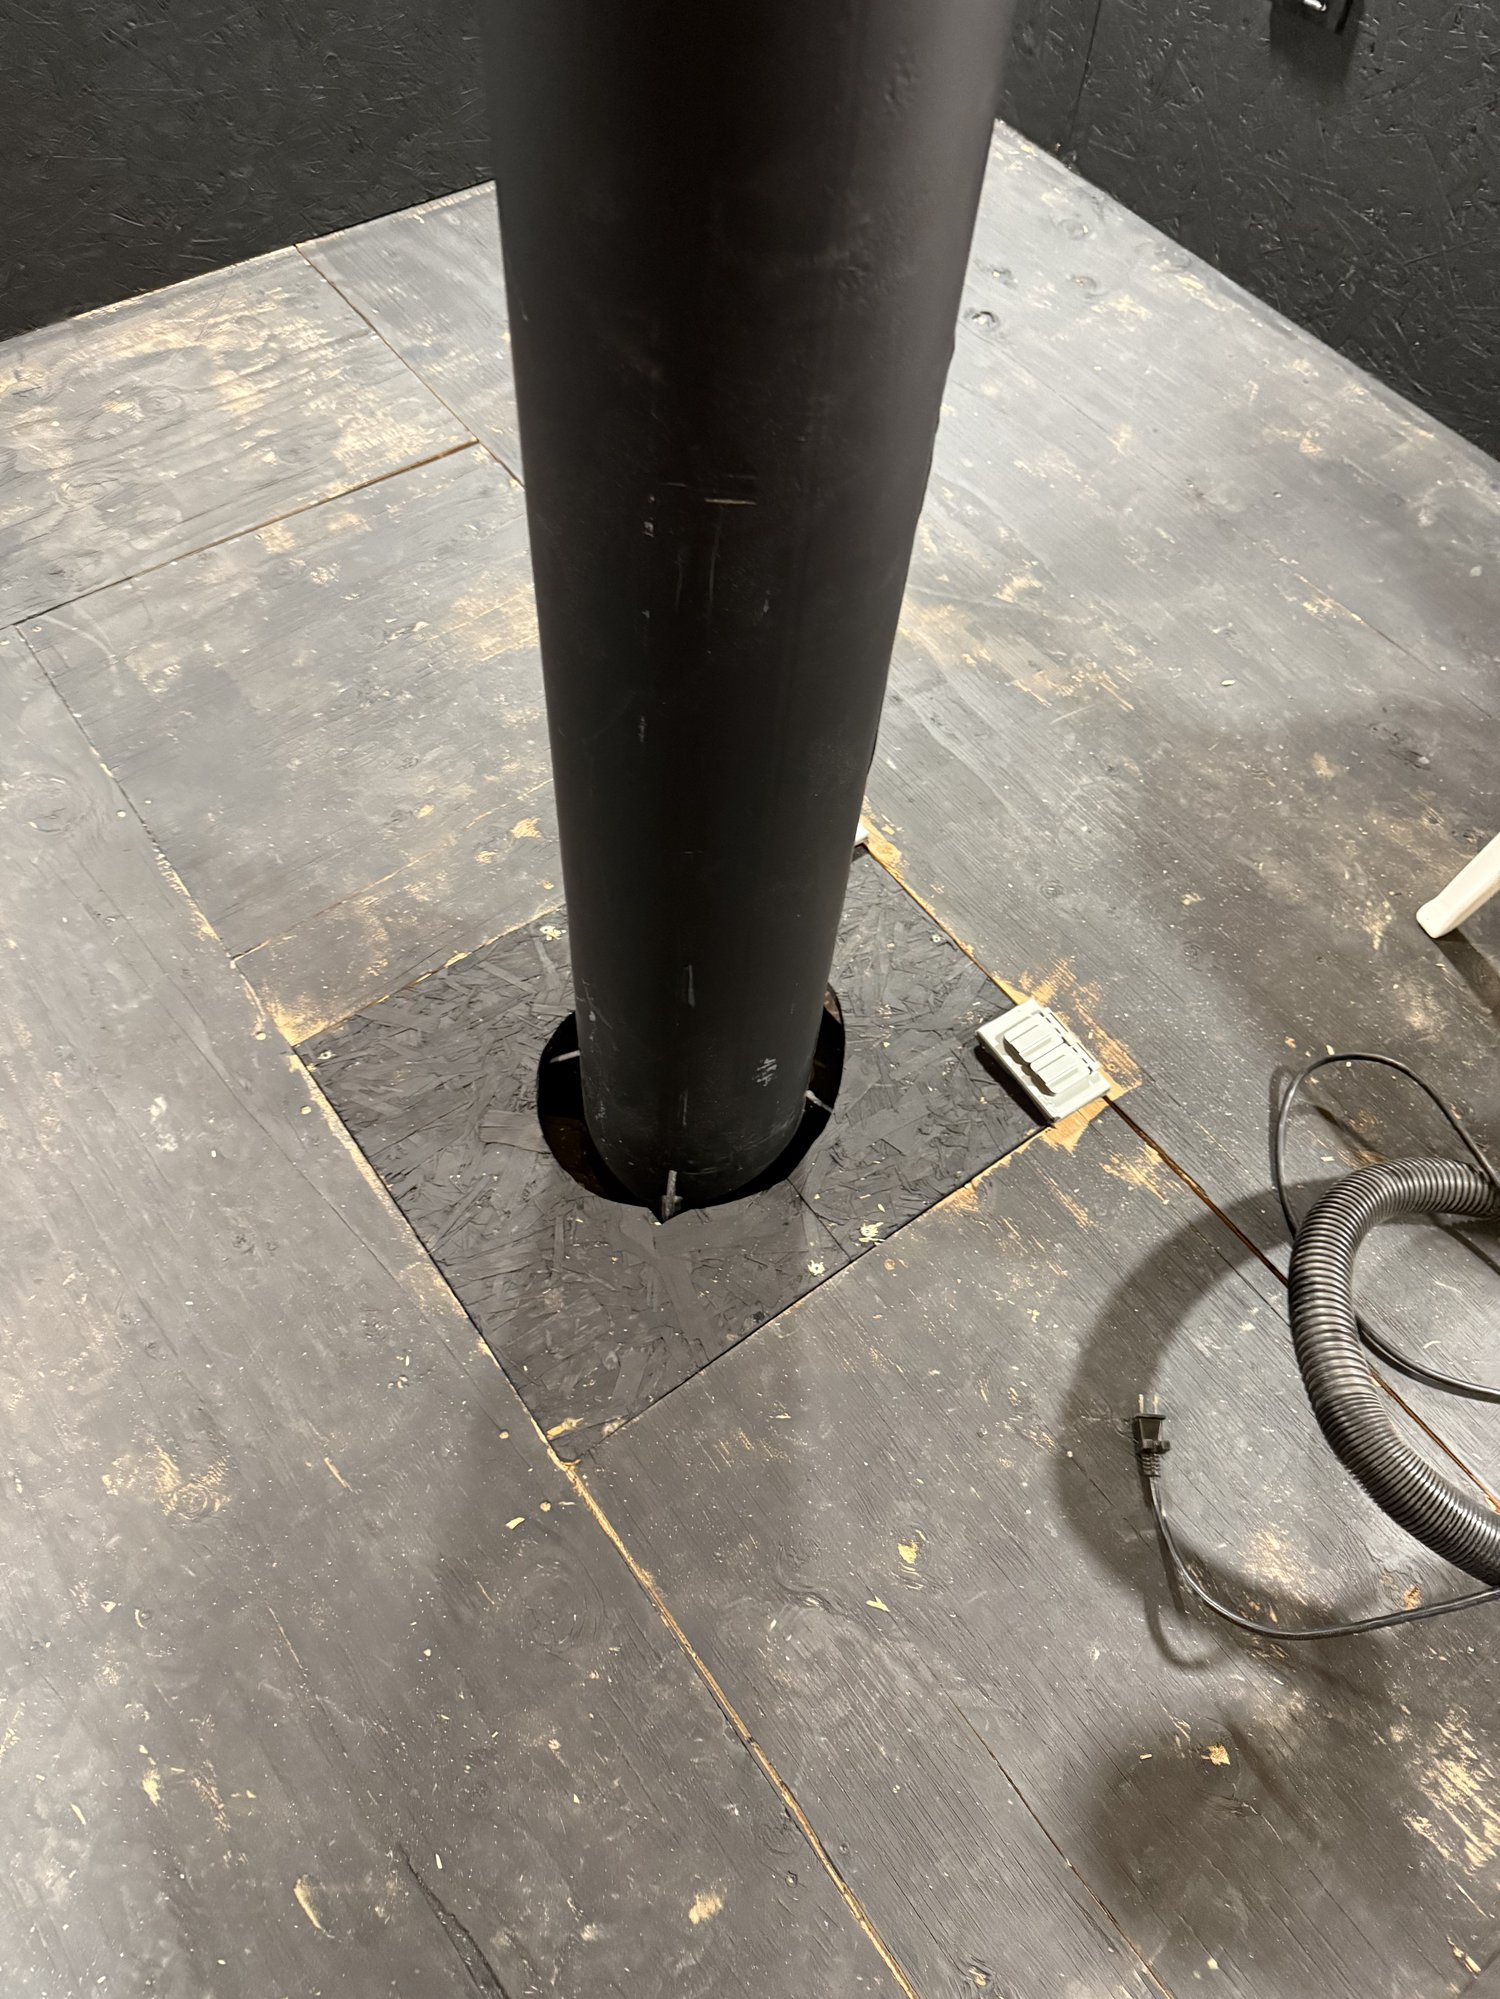 The steel pier rising through the finished floor — note the gap around it. It never touches the building, so footsteps and wind loading on the walls don’t transmit into the mount.
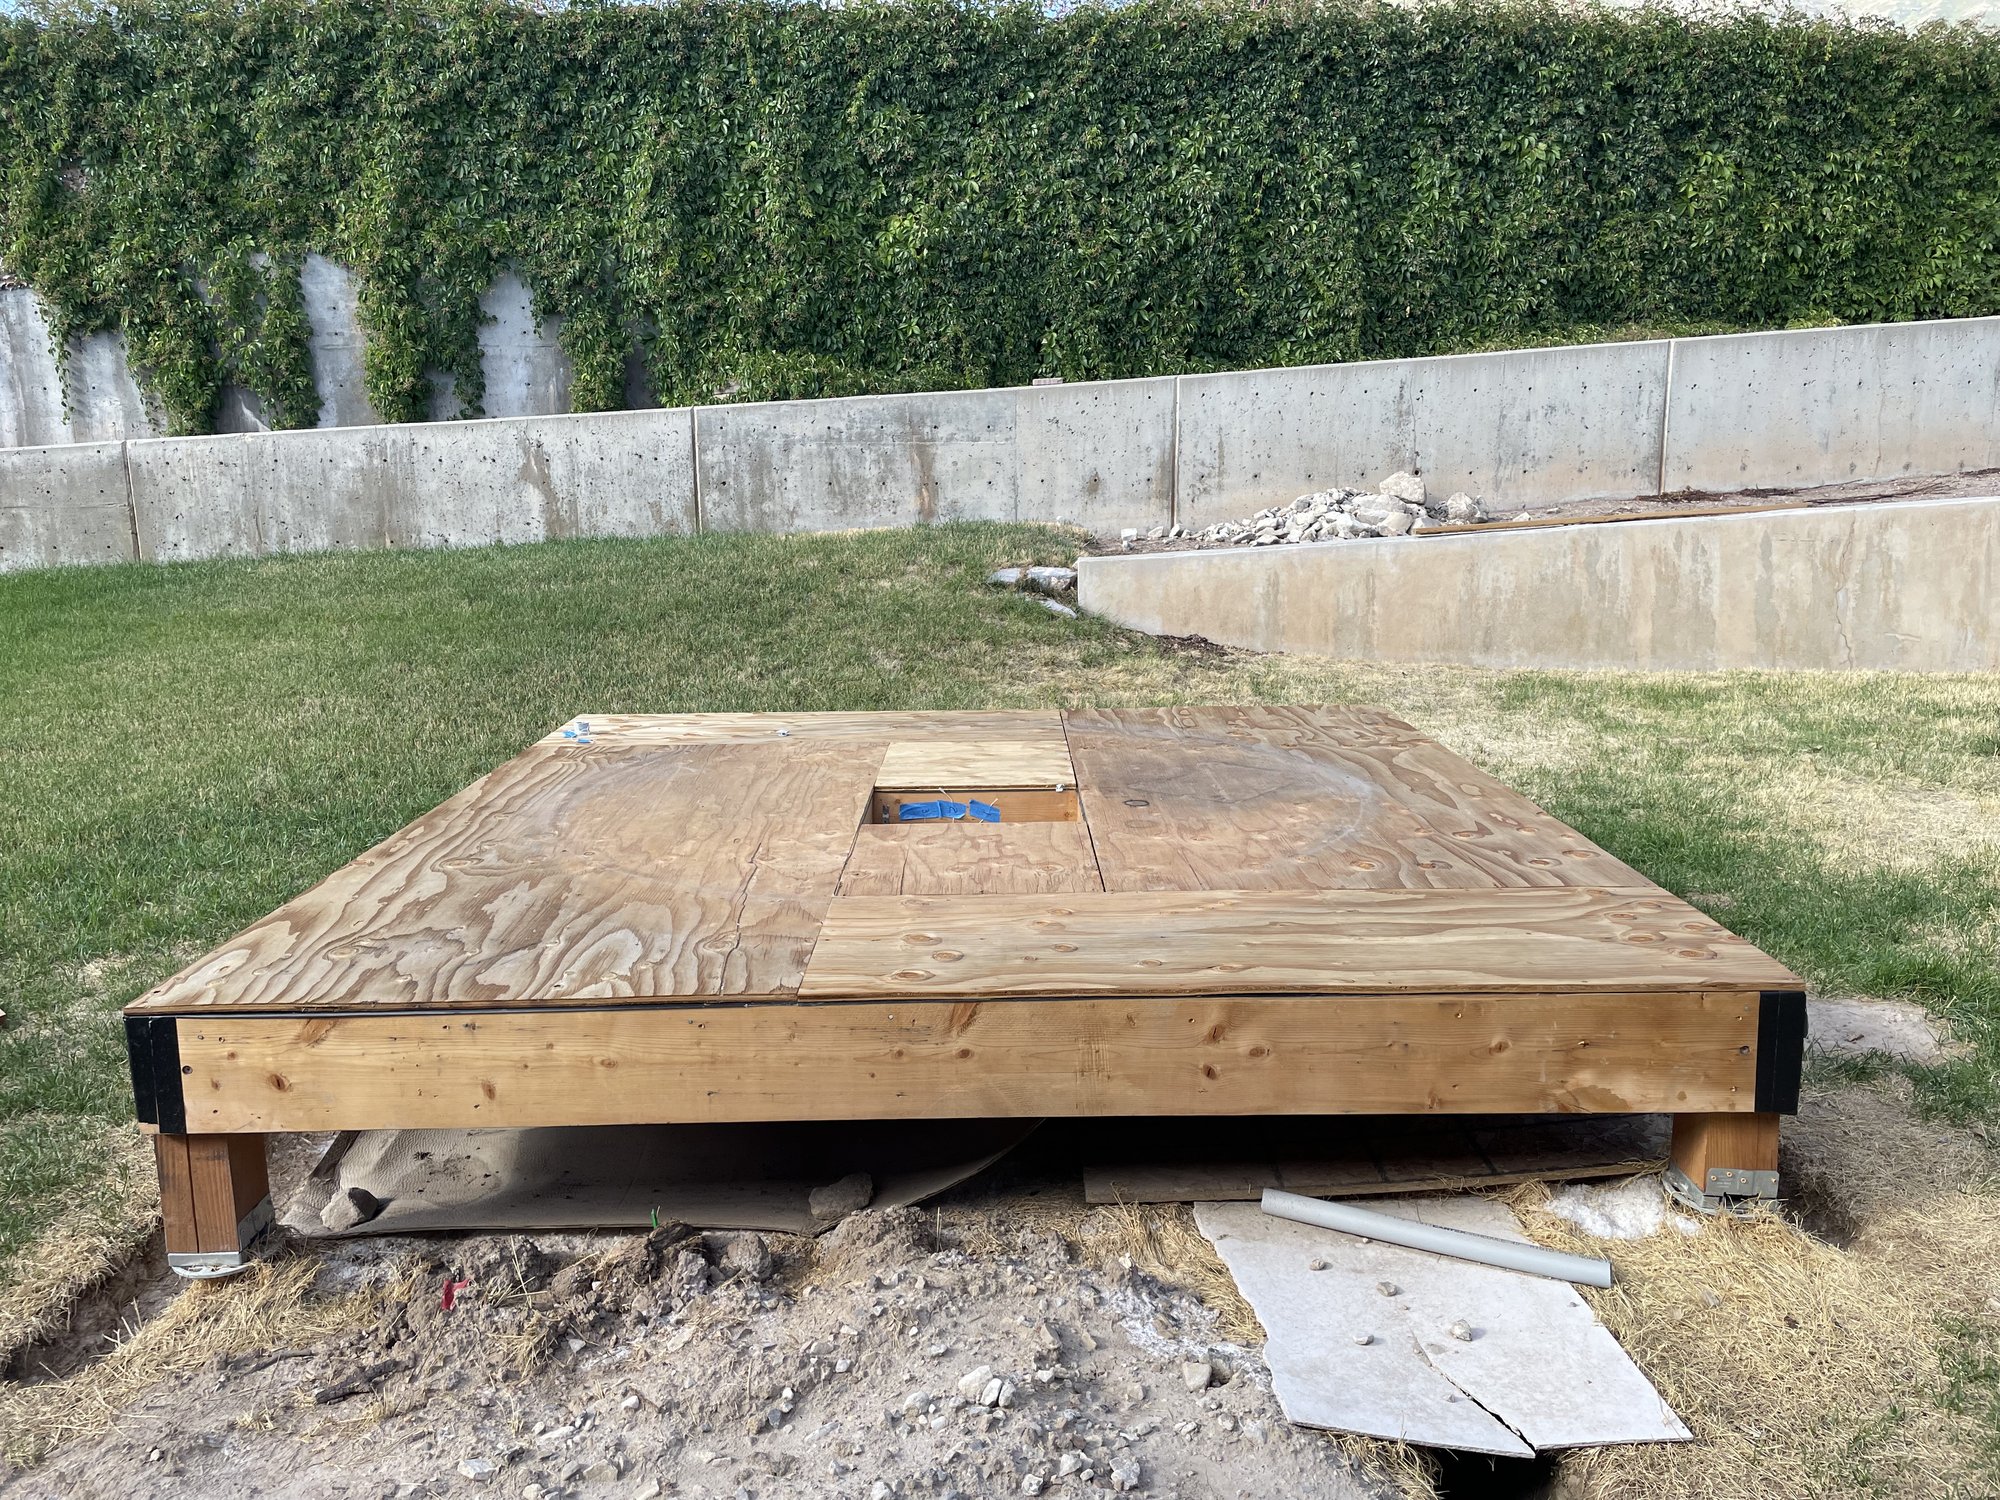 The floor deck sitting on its corner posts — each one lands on a helical screw pier driven into the ground, floating independently of the center pier.
I had this base — the concrete pier, the helical piers, and the steel pier itself — custom built rather than doing it myself. Everything above the foundation is my own work.
There’s a bit of trivia attached to the steel pier itself: it was a gift from a friend whose own observatory had burned down. The pier survived the fire intact — it just needed a sandblast and a powder coat to look new again. It’s been sitting under my mount ever since.
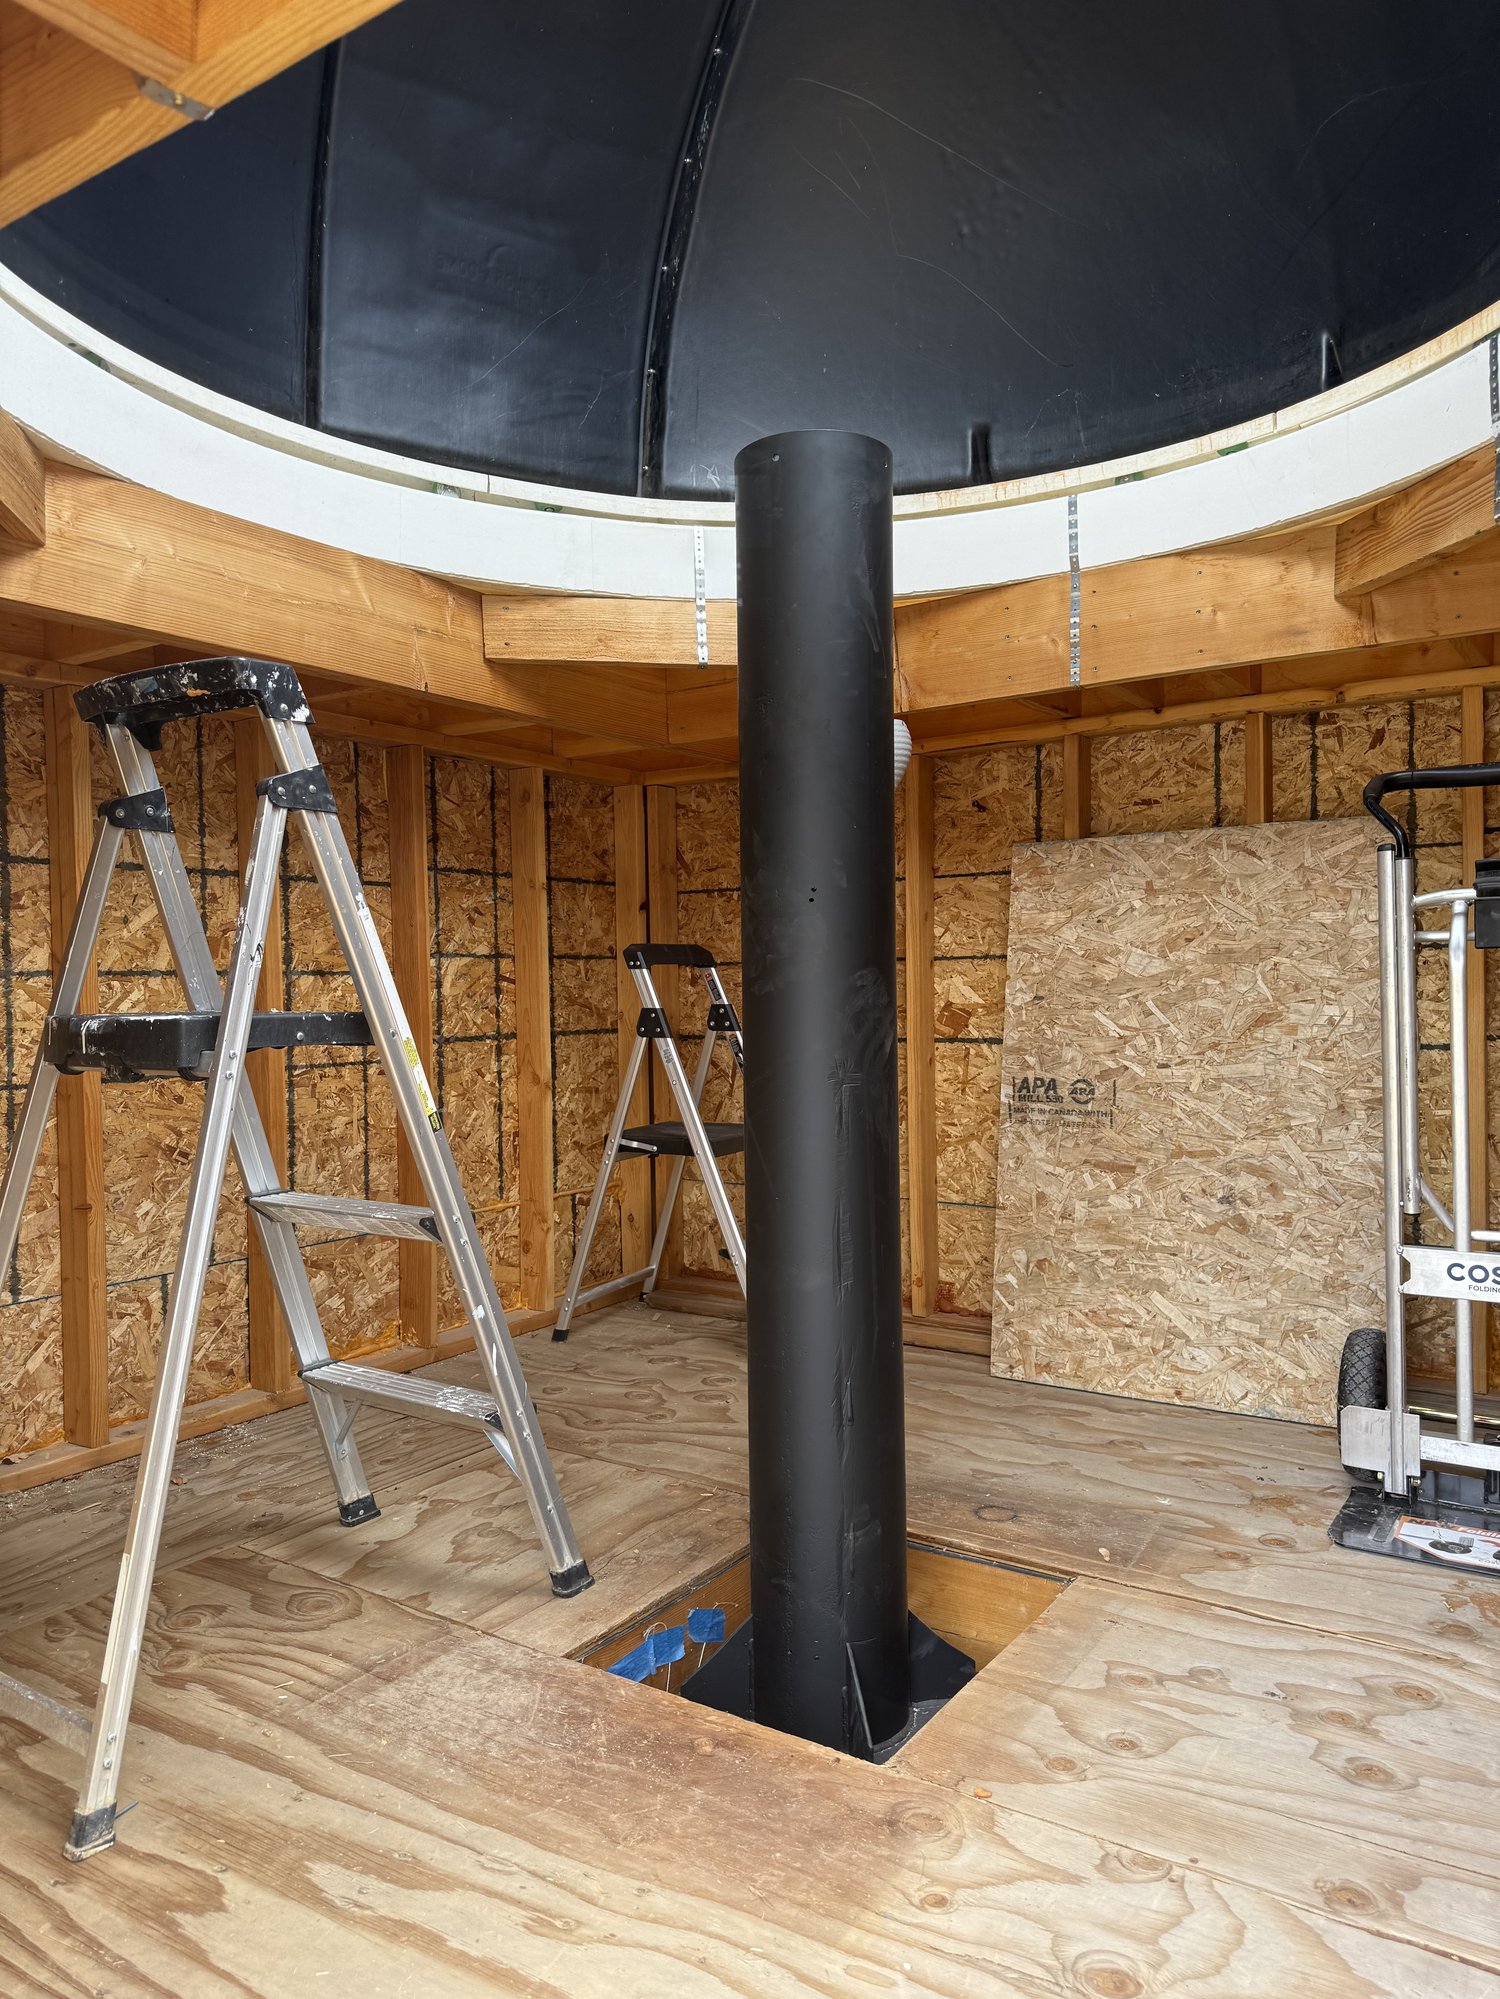 The same pier after its sandblast and powder coat — good as new, and now doing its second tour of duty under someone else’s mount.
The building
The walls are conventional lumber framing, 10 feet square, sheathed and finished on the outside with cement board — durable, and it handles weather without much fuss. Inside, the walls are insulated and finished with plywood, and the floor is covered in rubber shop floor sheets from Home Depot, which hold up well to tripod feet, dropped tools, and the occasional spilled coffee.
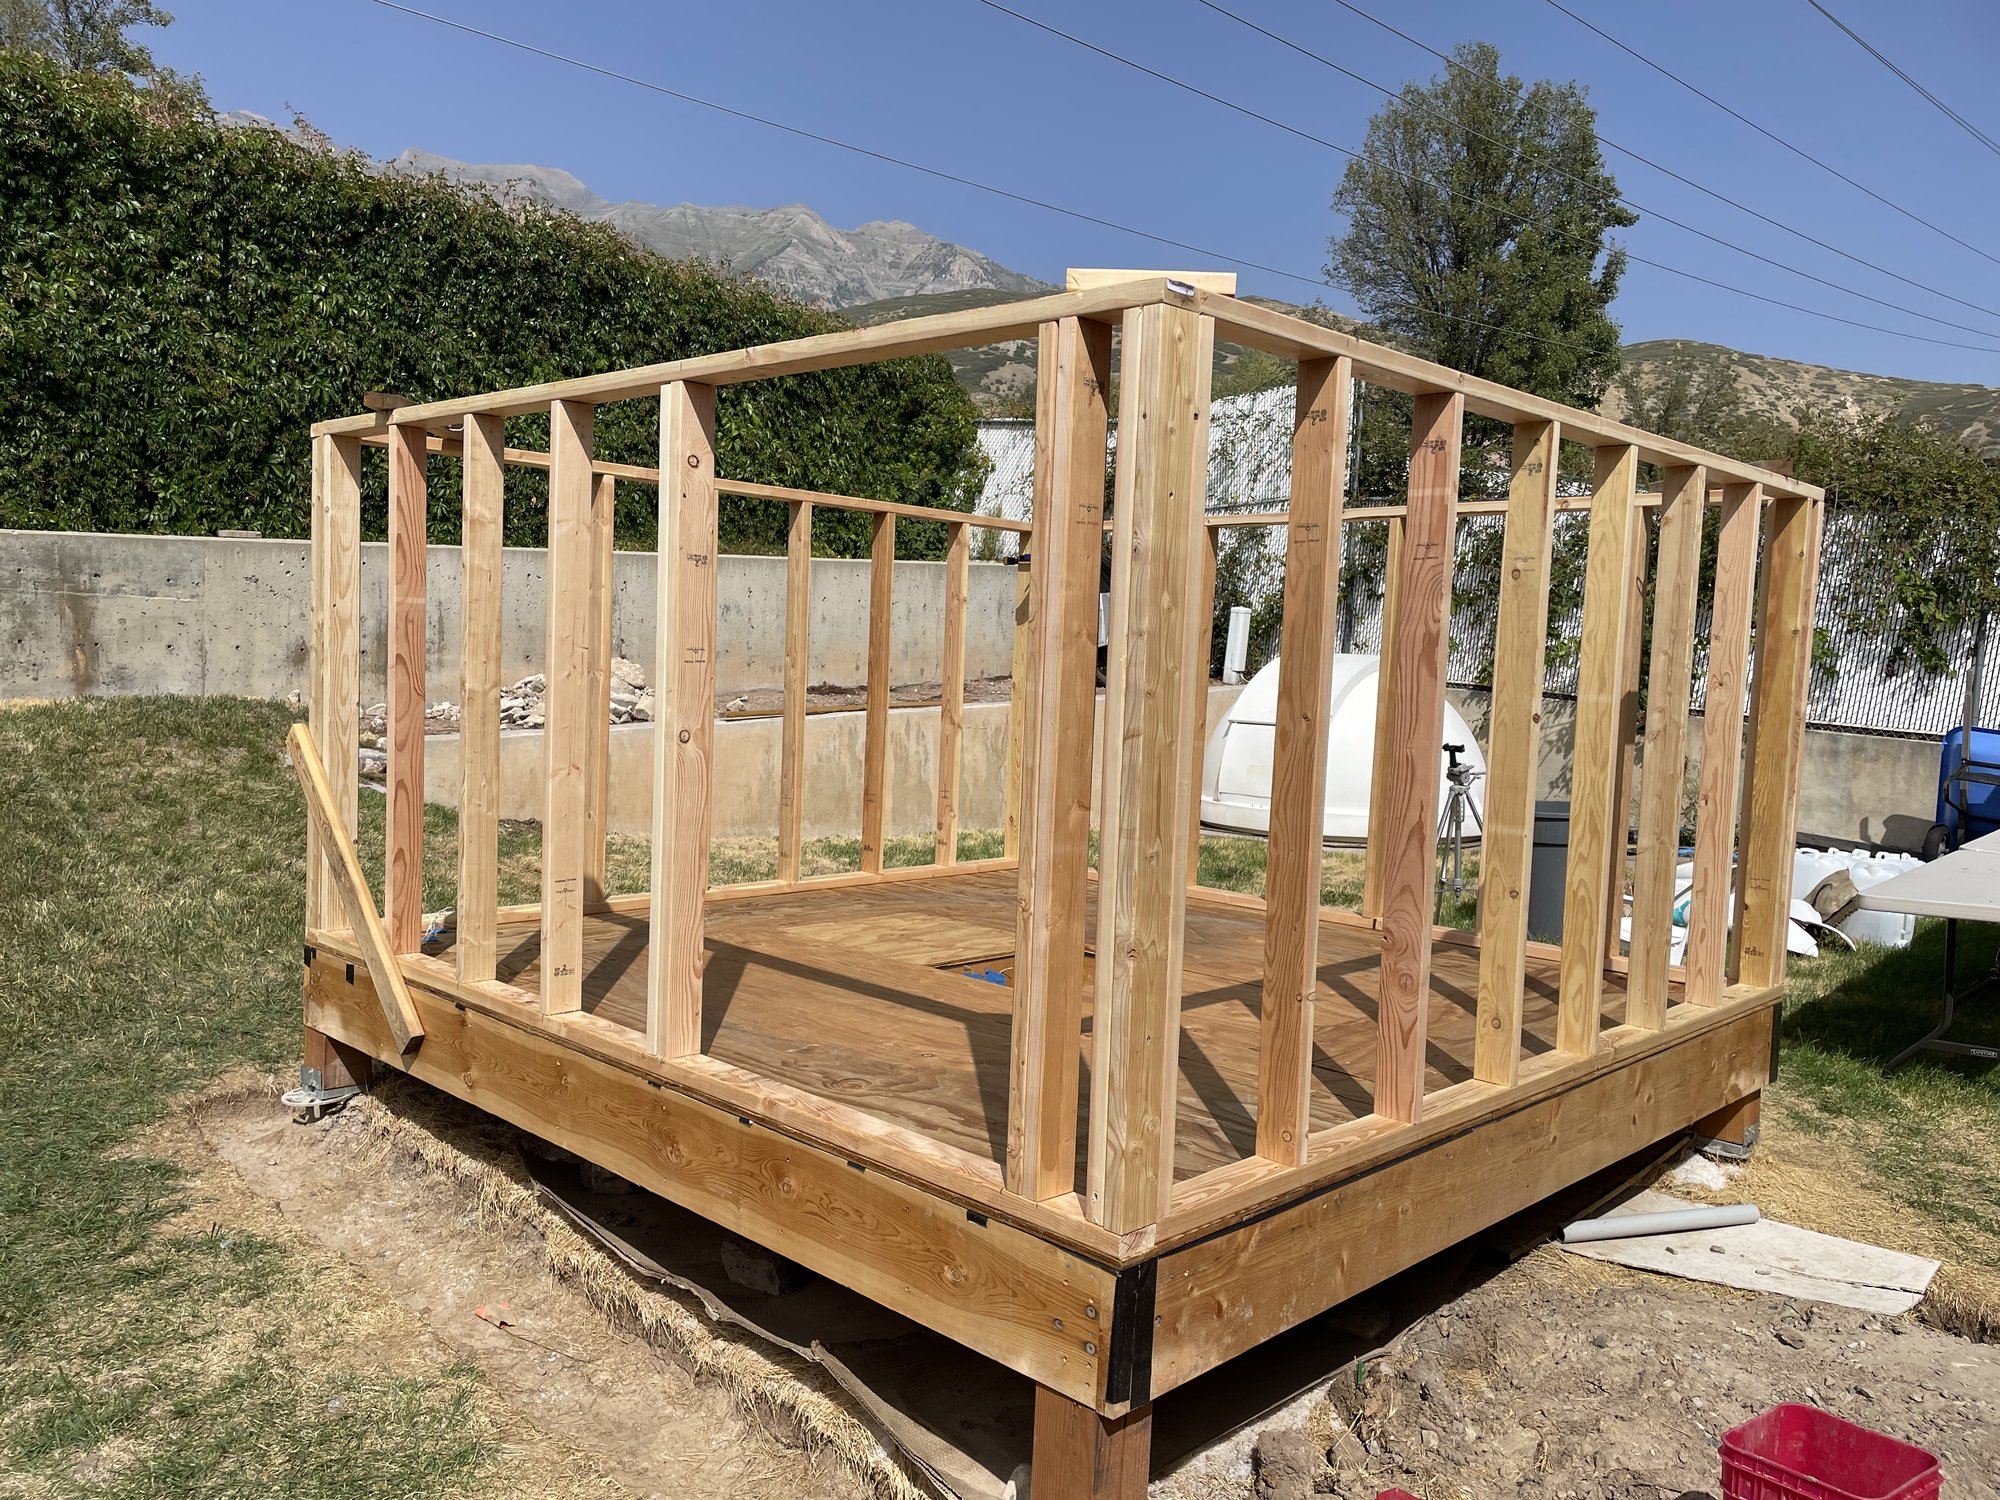 Walls framed on top of the deck, before any siding went on — the dome was already on hand, waiting for its turn.
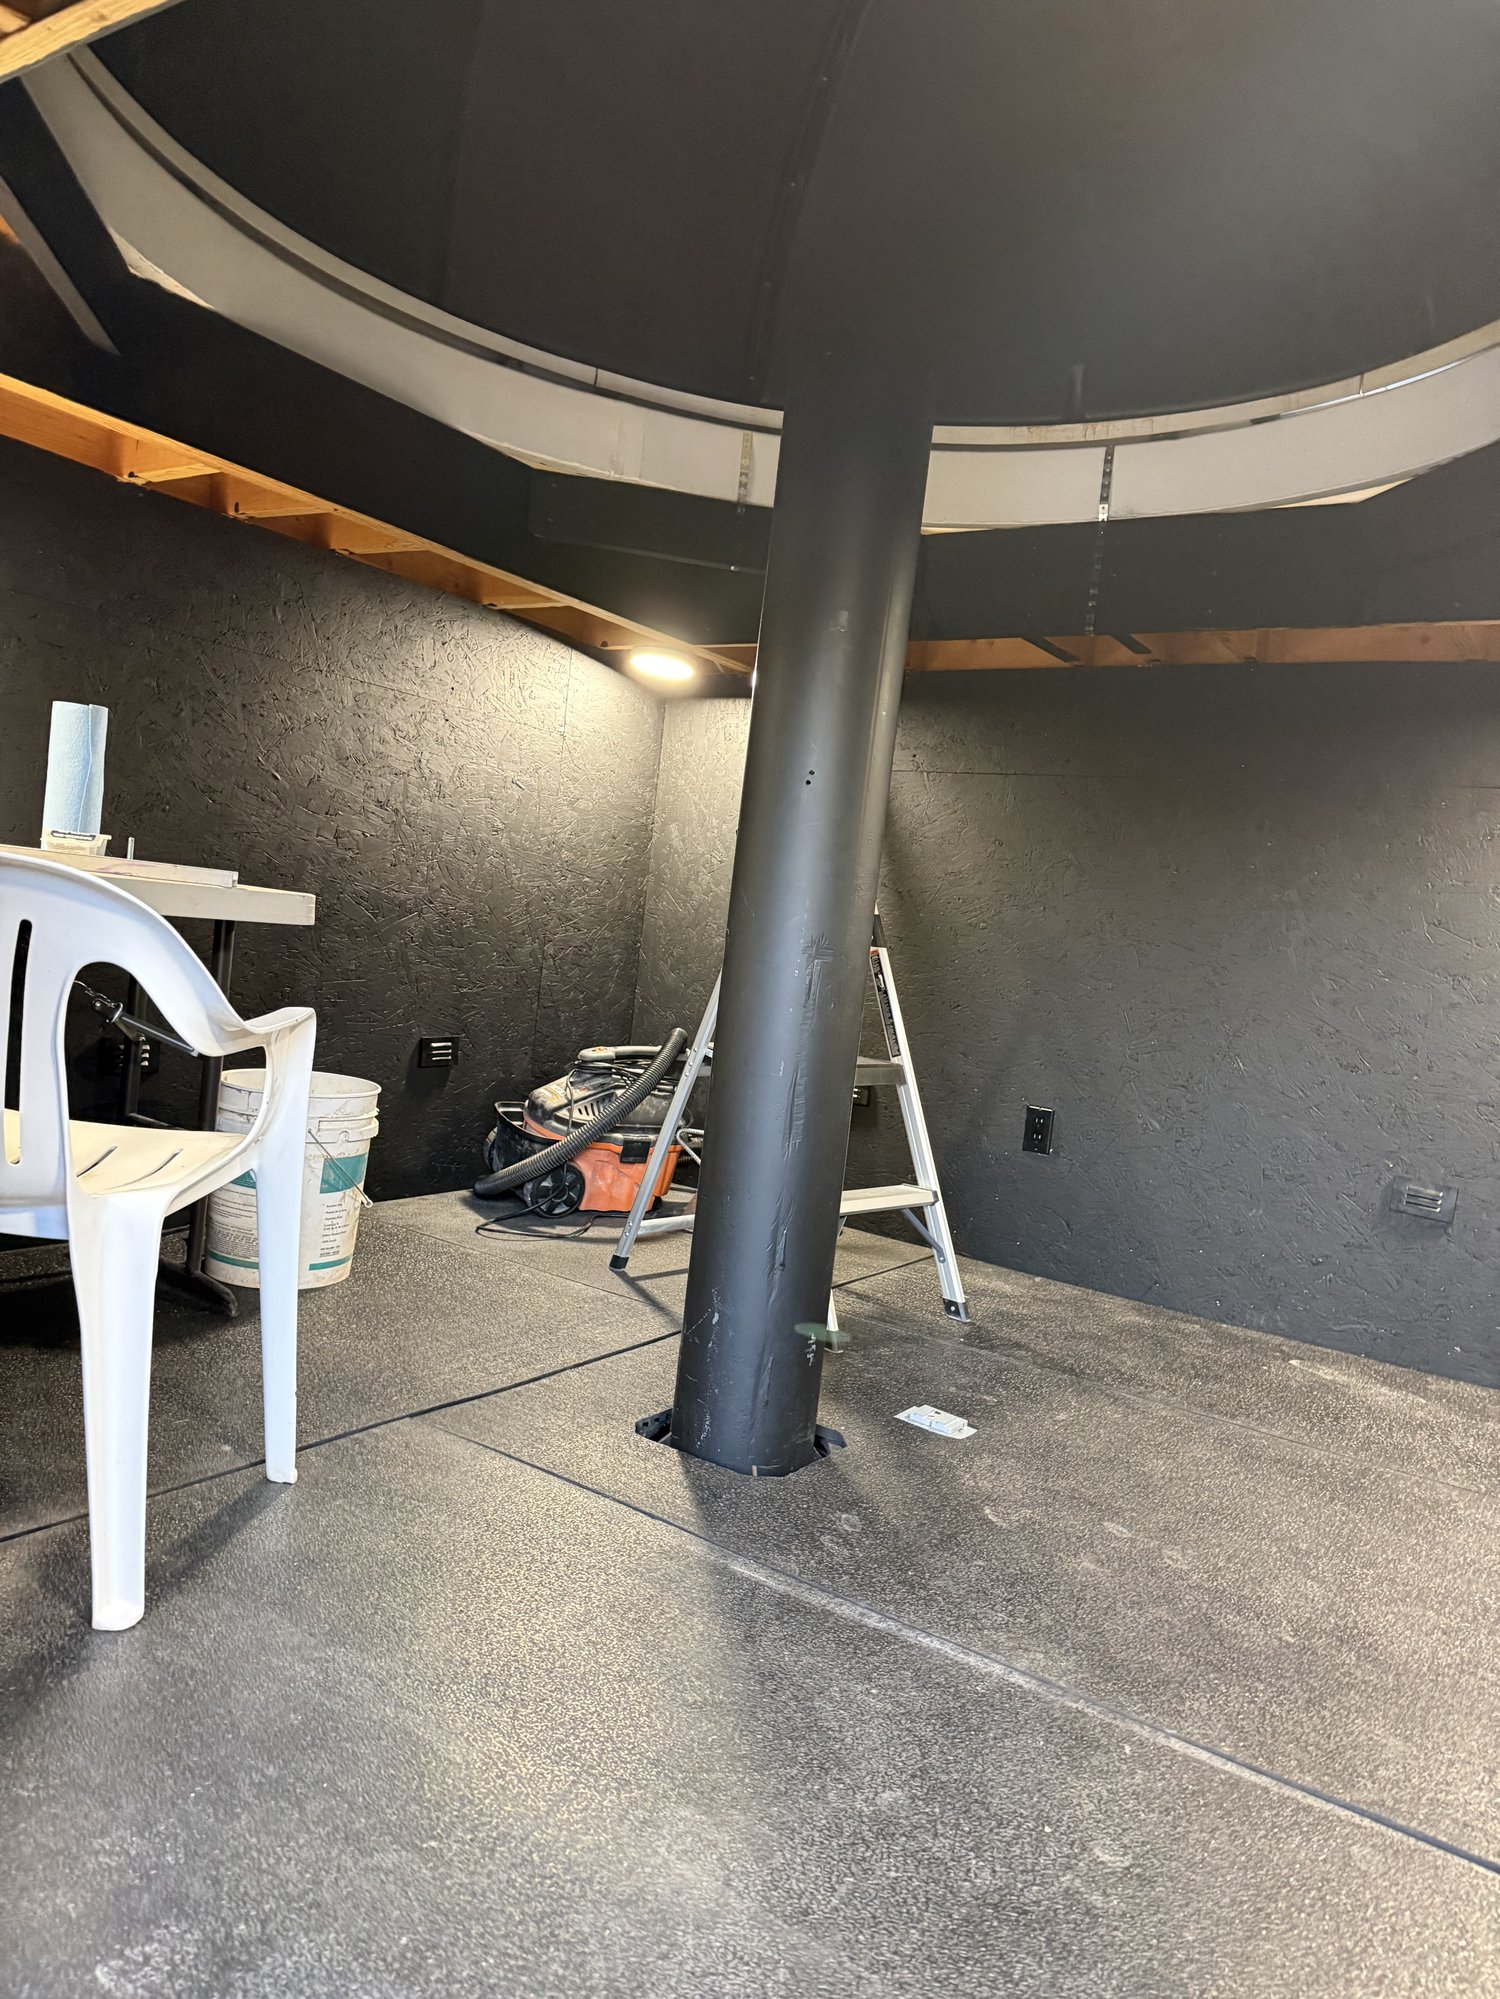 Finished inside — insulated walls, the rubber shop-floor sheets underfoot, and the pier still rising through its own island in the middle of the room.
The dome
The dome itself is a used 8’ Exploradome, running on a MaxDome II controller. Right now it only has rotation control, which is driven directly from NINA during imaging sessions — the shutter is still manual. Automating the shutter is the next project on the list.
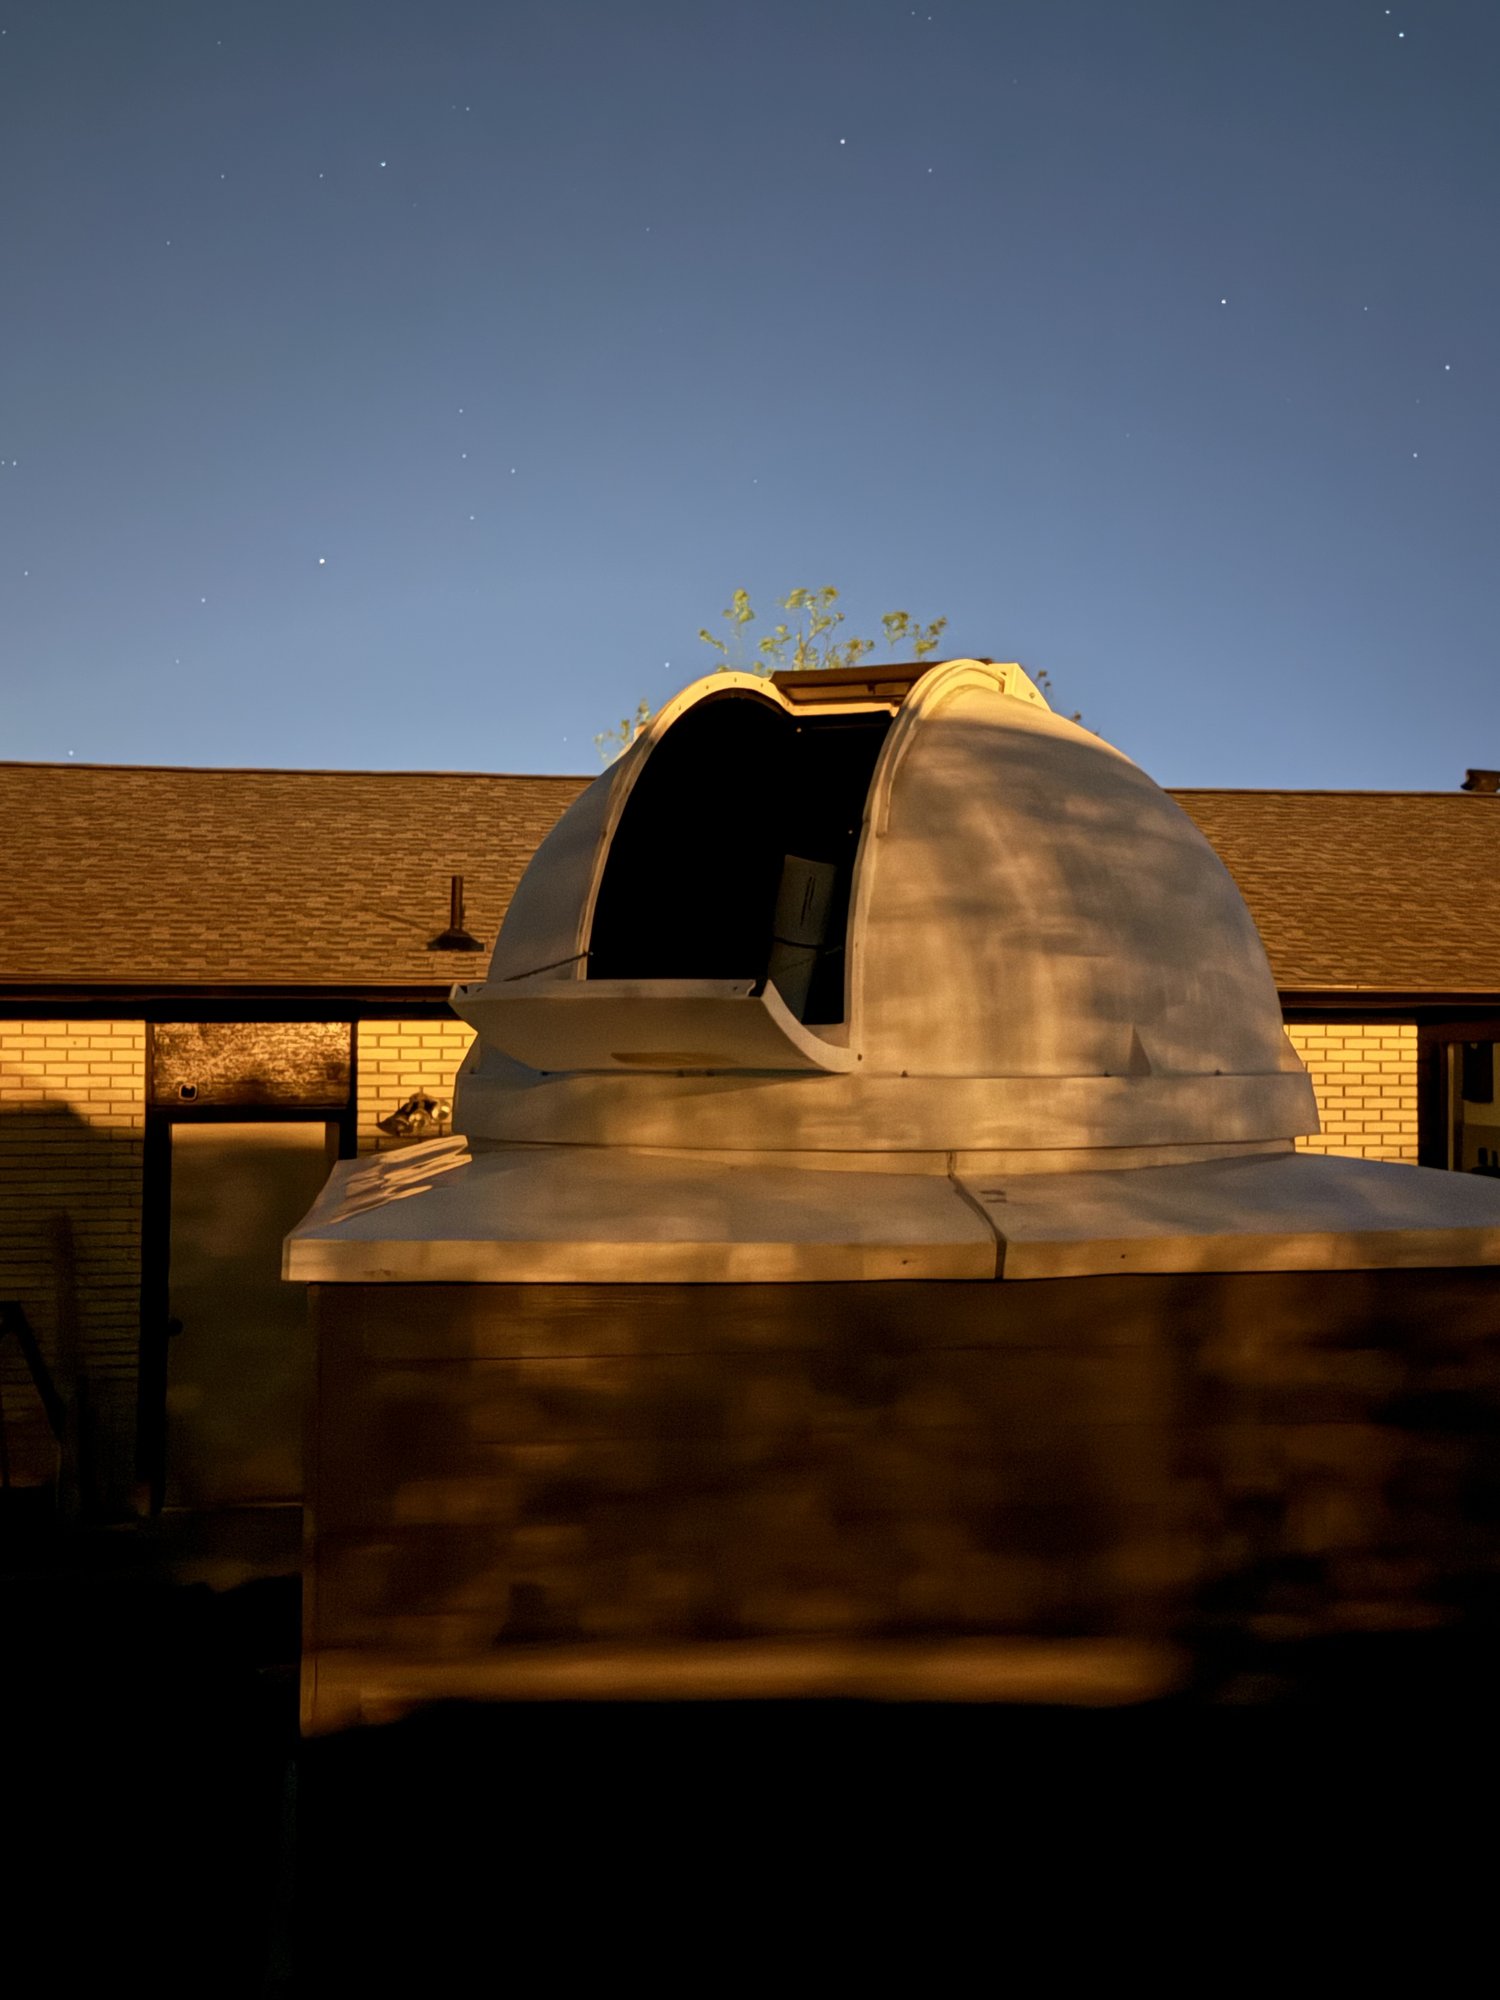 Shutter open at dusk, ready for the night — the dome’s rotation is driven from NINA, though for now someone still has to open the shutter by hand.
Rotation also runs through a Dome Soft Start module from ANS Consulting, which ramps the rotation motor up gradually instead of starting it at full speed right away. That reduces wear and tear on both the drive hardware and the building itself every time the dome starts moving.
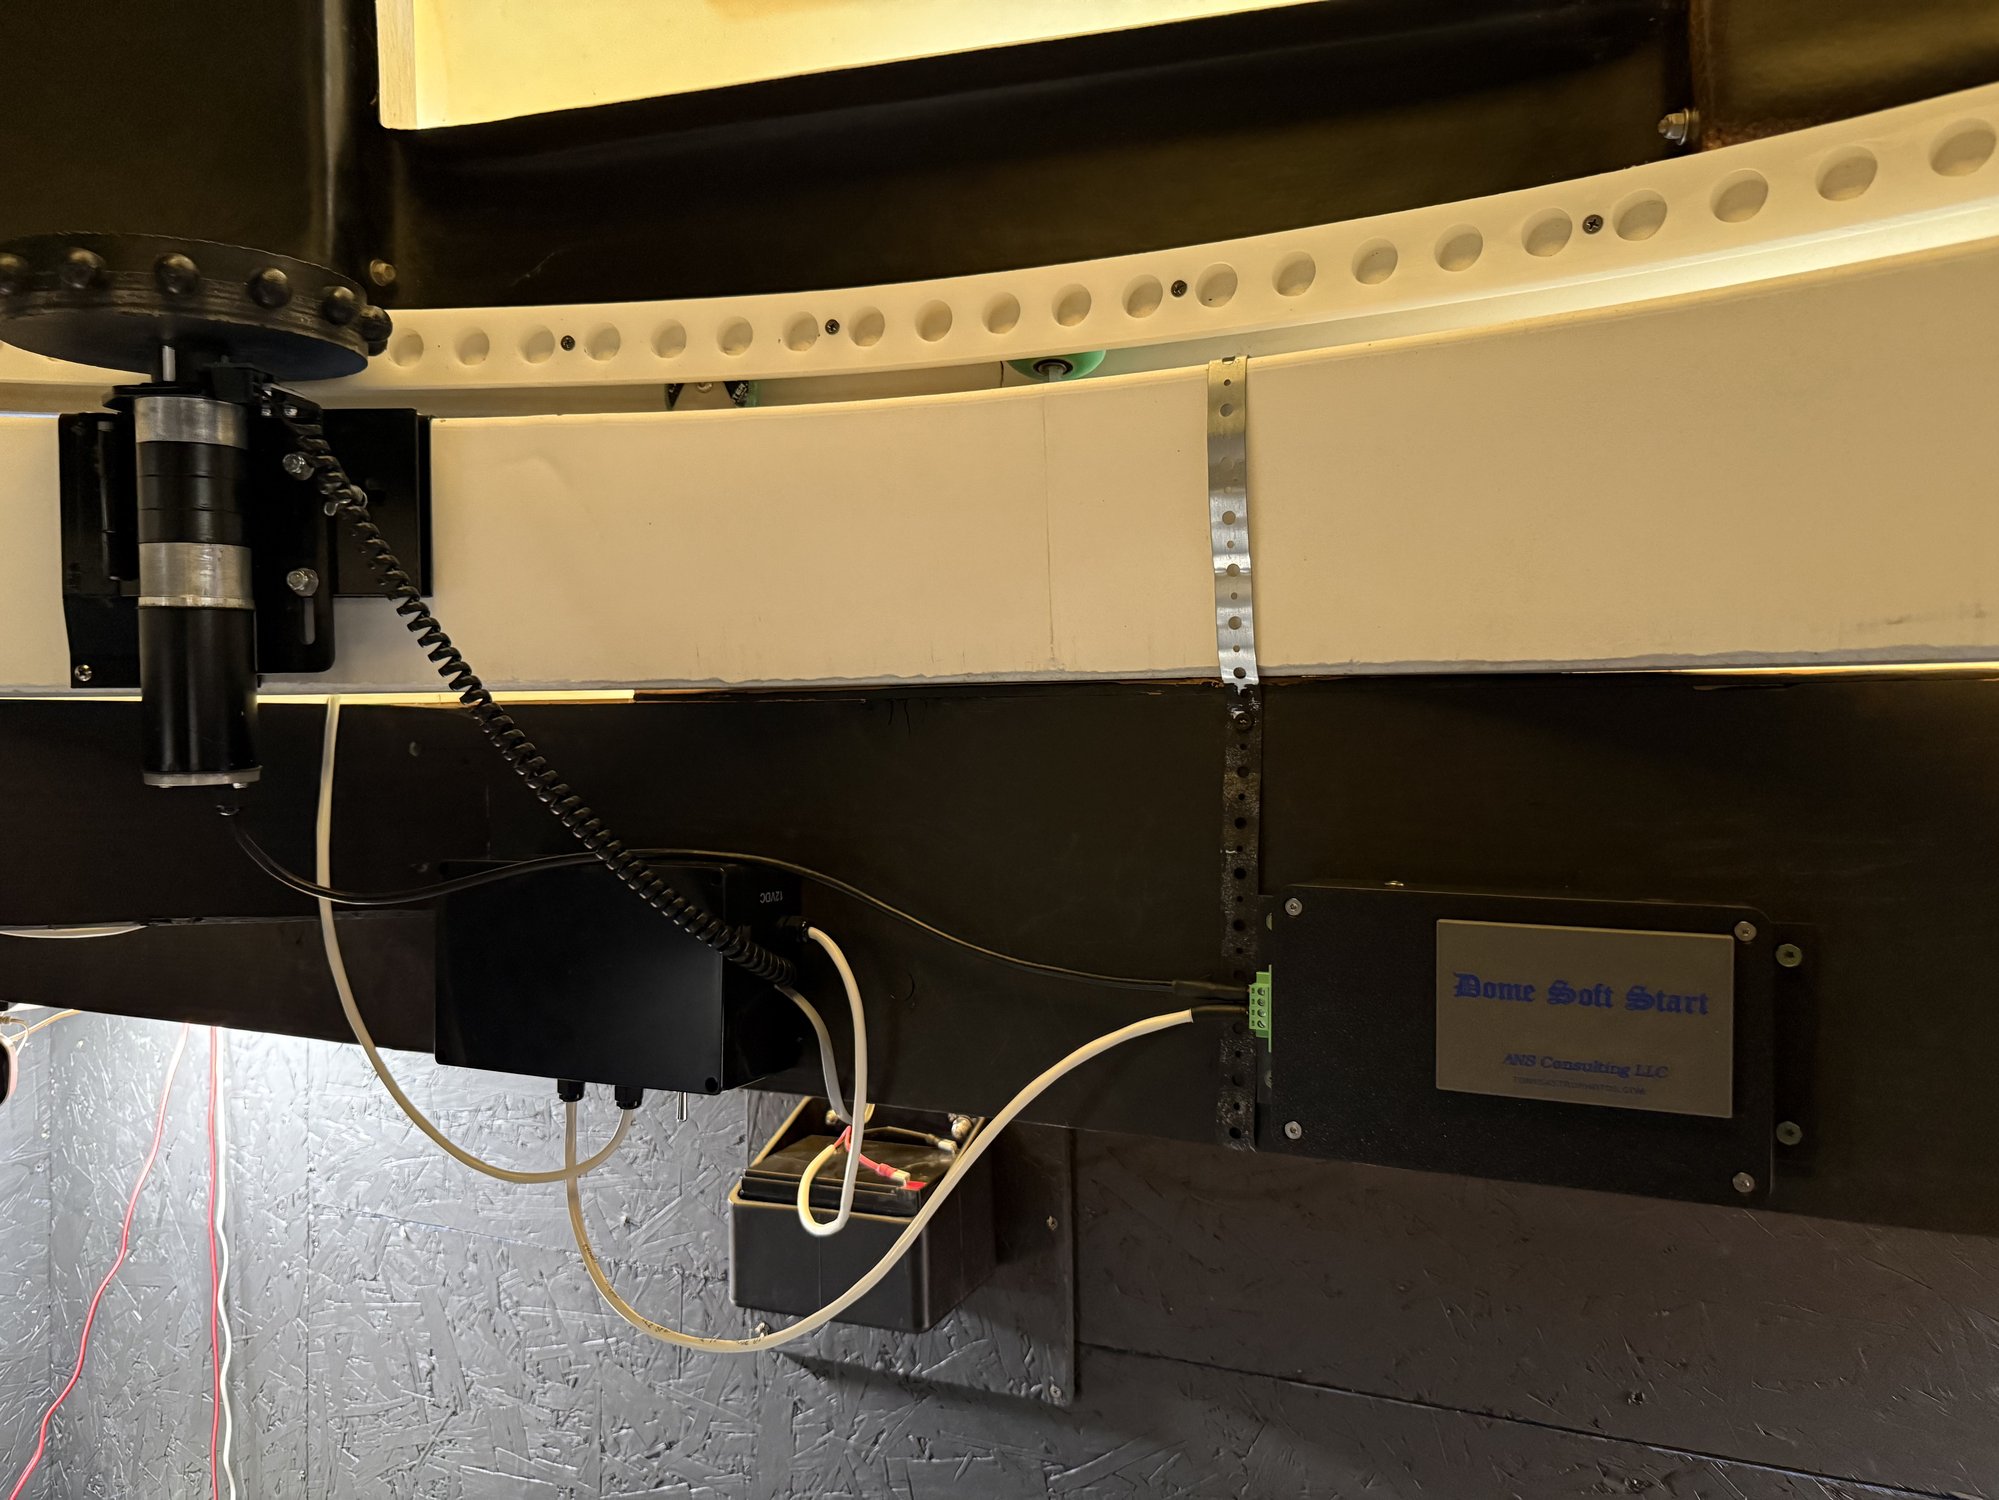 The rotation drive motor and control wiring, with the ANS Consulting Dome Soft Start module mounted alongside it — it ramps rotation speed up gradually rather than starting at full speed.
What’s inside
The observatory houses a Paramount MyT mount on that steel pier, most often paired with a 130mm f/7 refractor (with a 0.8x reducer/flattener, giving a 728mm focal length). It runs two interchangeable imaging setups — a Canon T6i DSLR for one-shot-color work, and a Minicam8 mono camera with a full SHO/RGB filter set for narrowband imaging — guided with PHD2 and sequenced through NINA.
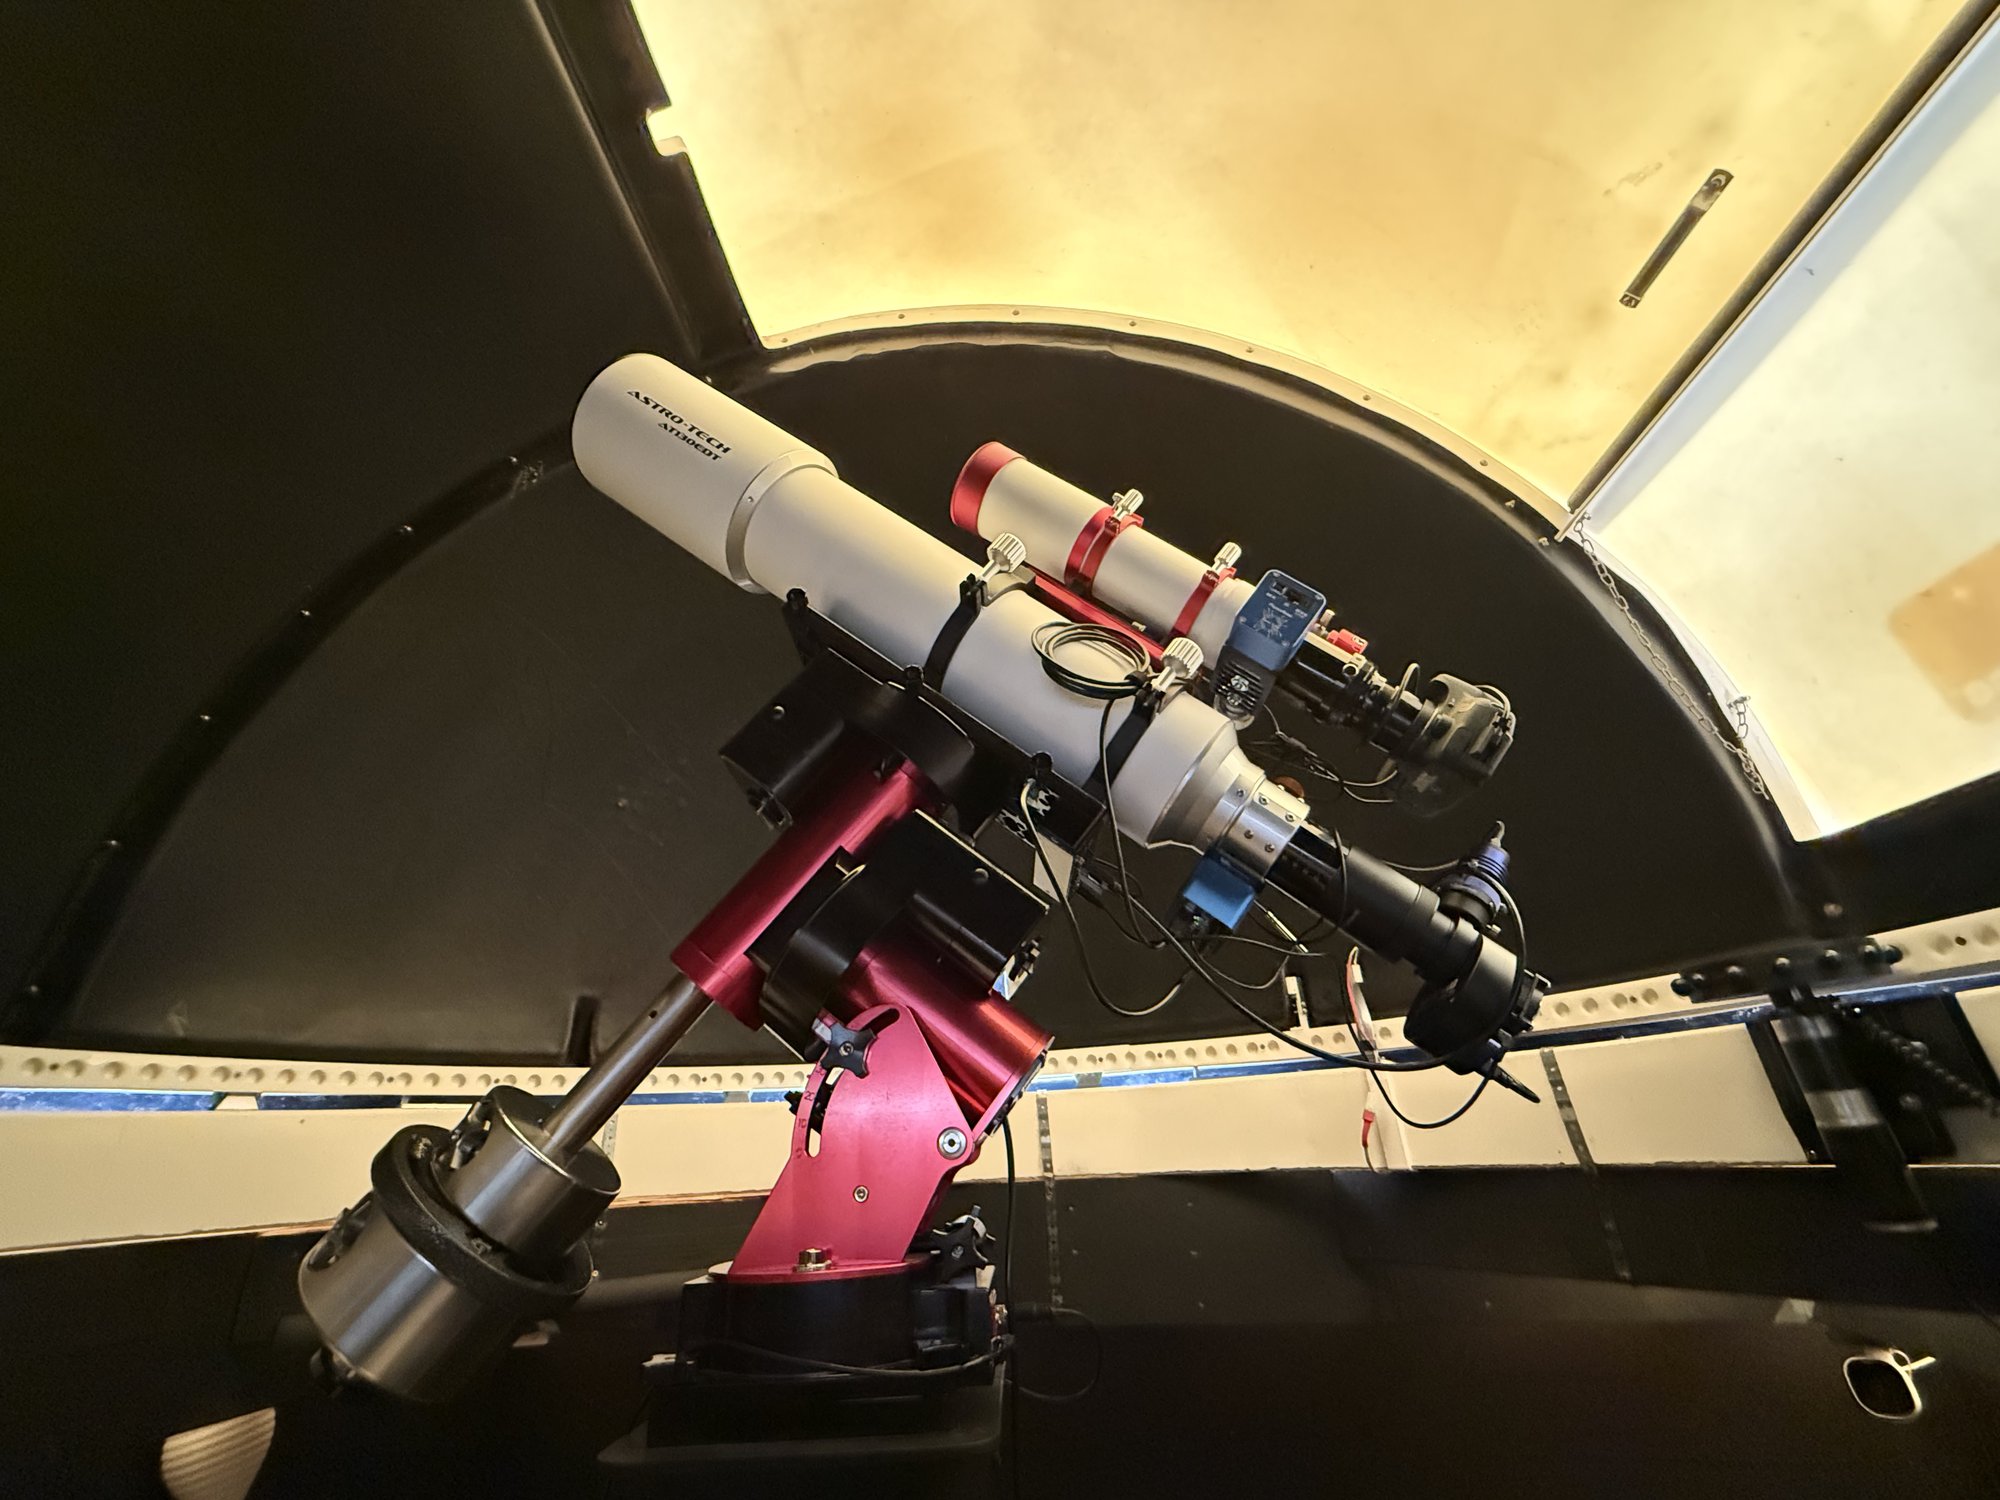 The 130mm refractor on the Paramount MyT, parked under the dome between sessions.
What I’d change
If I built this again, I’d make the walls a foot or so taller. I was worried about the dome being visible over the roofline from the street out front, and I overcorrected — the building does its job and the dome stays hidden, but the tradeoff is that I have to duck to get through the door every time. It works, but it’s the one design decision I’d revisit if I were starting from scratch.
Cost and timeline
All told, the build cost roughly $8,000 and took about two years from start to finish, though that includes long stretches where other things needed my attention and the project just sat. If you’re planning something similar, I’d budget both money and calendar time generously — a backyard observatory is very much a “when I have a free weekend” kind of project unless you’re paying to have the whole thing built out.
Why it’s worth it
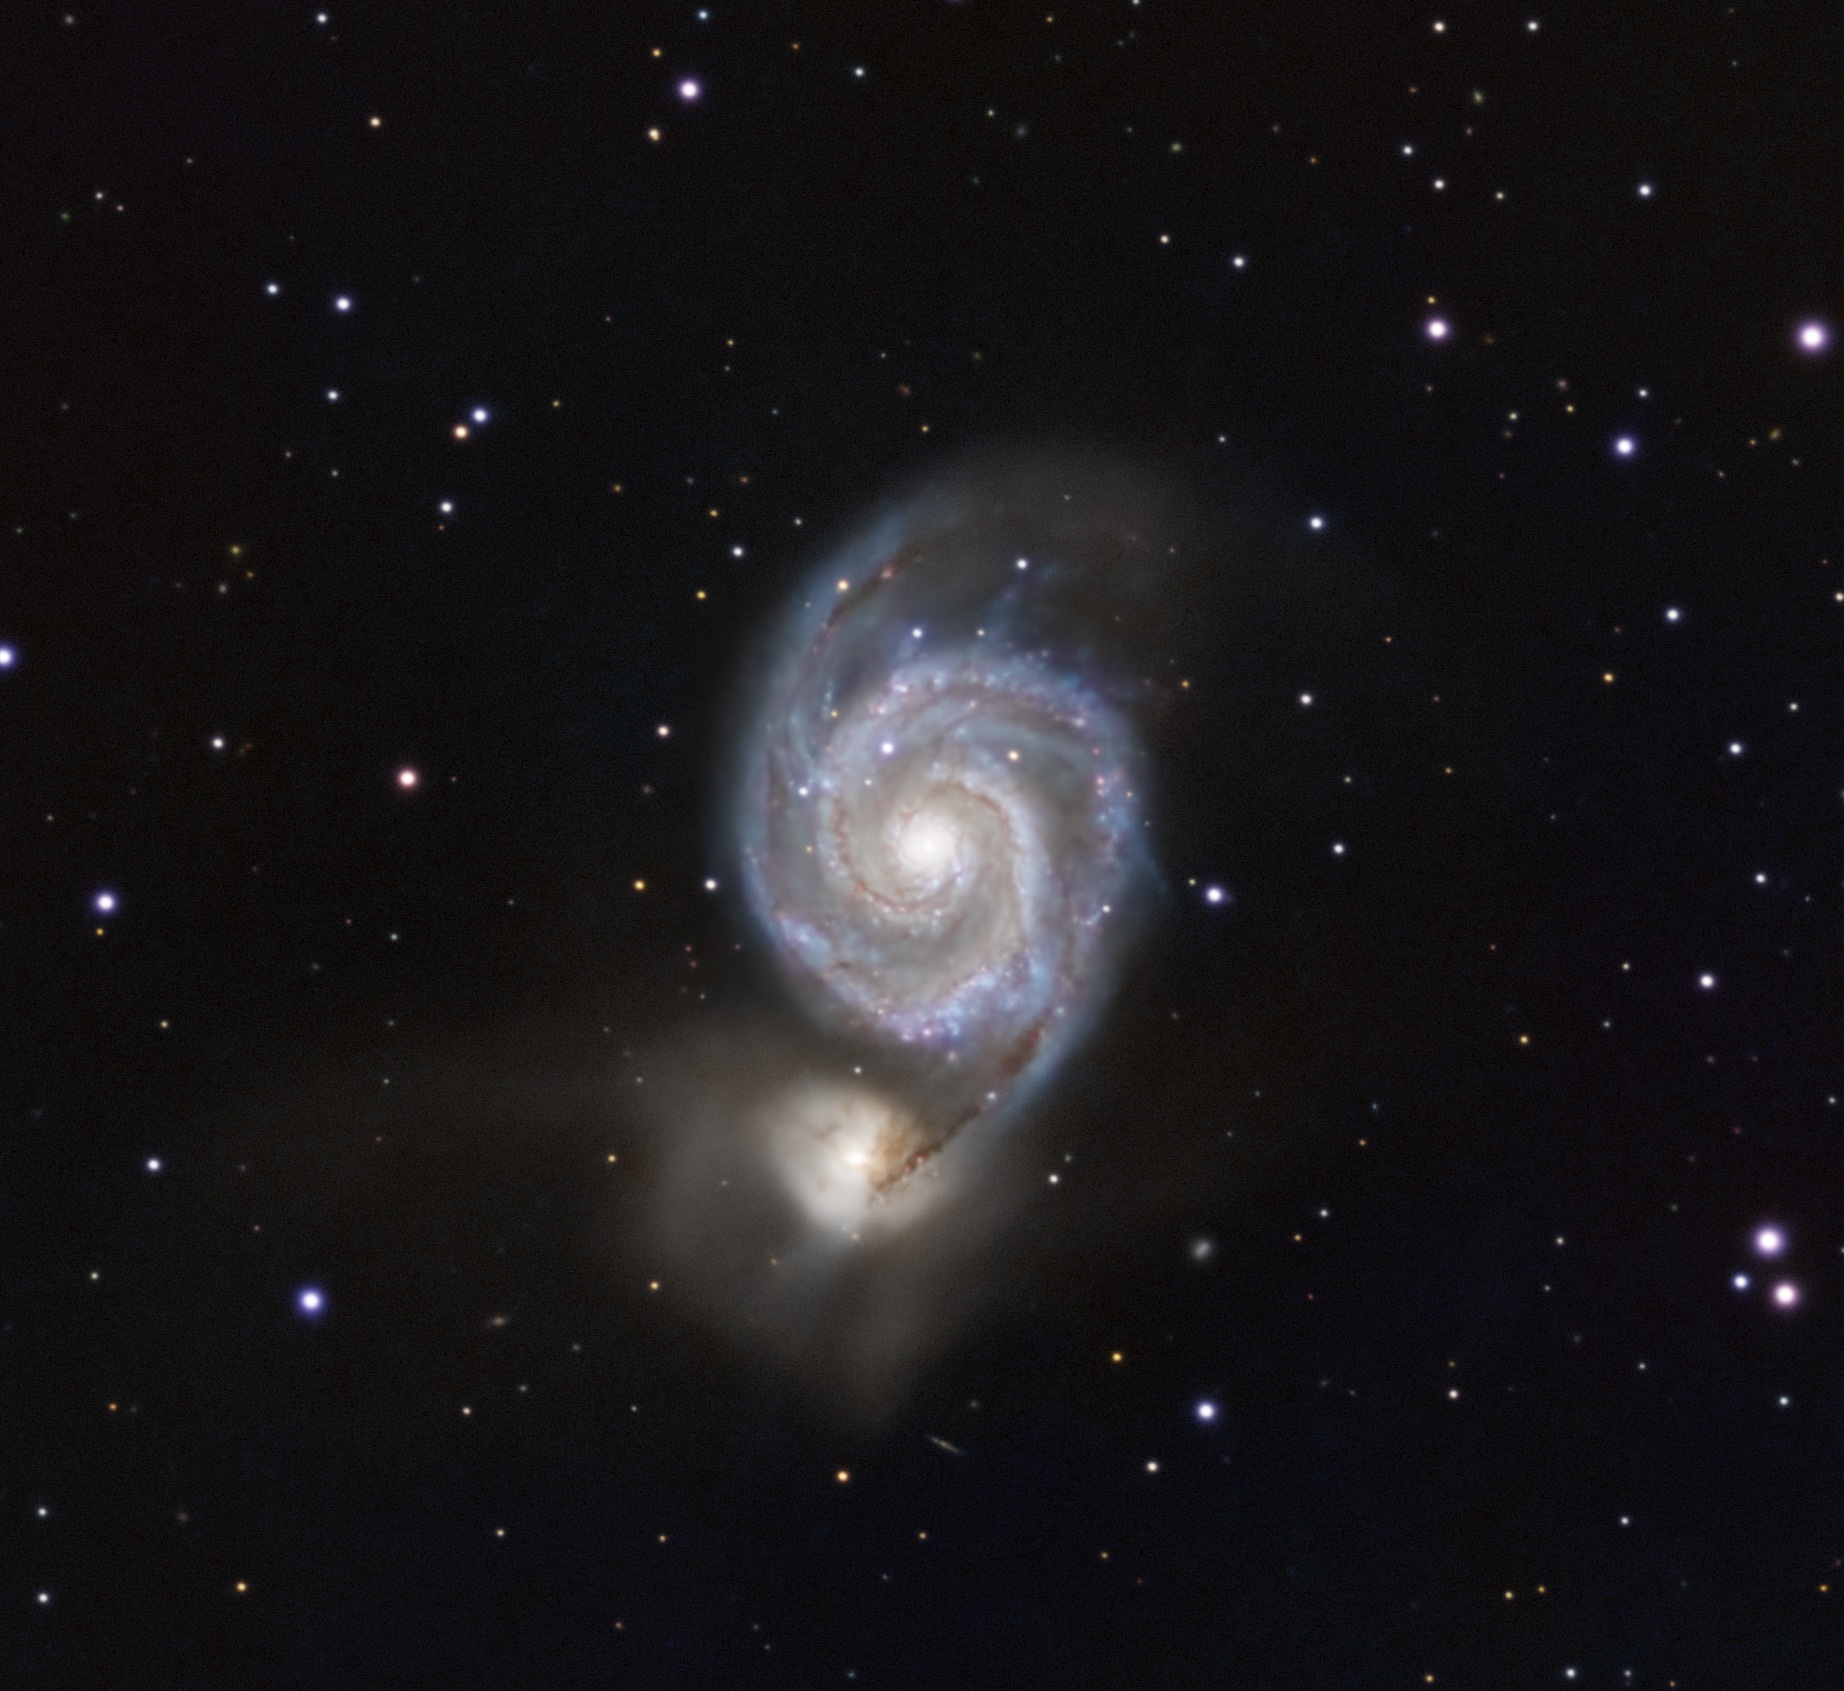 M51, the Whirlpool Galaxy.
None of the framing, wiring, or pier isolation is really about convenience for a single night — it’s about what happens across many nights. With a permanent pier and mount, polar alignment and TPoint pointing model stay put between sessions, so there’s no re-leveling a tripod or re-aligning a mount before every run. I can pick a target, image it for a couple of hours, close up, and come back the next clear night to pick up right where I left off — stacking that additional integration time onto the same dataset instead of starting over. For deep-sky targets that want many hours of total exposure, that multi-night flexibility matters more than almost anything else in the setup.
What’s next
Shutter automation is the obvious next step — right now every session starts and ends with me physically opening and closing the dome by hand. Once that’s wired up, the whole rig should be close to fully remote-operable. I’ll follow up with a post on that once it’s done.
Questions about the build — foundation, dome, wiring, anything else? Let me know, I’m happy to go into more detail on any piece of this.